Will featured image display?
Thanks for stopping by! I’m going to be posting new content very soon, including the jewelry pieces and sets y’all probably saw at the Fall Fest at Arium Trailwood on October 30th! Please hang tight while I get things in order.
aaaOK, so images can get quite complicated as we have a few variables to work with! For example the image below has had a caption entered in the WordPress image upload dialog box, this creates a shortcode which then in turn wraps the whole thing in a div with inline styling! Maybe one day they’ll be able to use the figure and figcaption elements for all this. Additionally, images can be wrapped in links which, if you’re using anything other than color or text-decoration to style your links can be problematic.

This is the optional caption.
The next issue we face is image alignment, users get the option of None, Left, Right & Center. On top of this, they also get the options of Thumbnail, Medium, Large & Fullsize. You’ll probably want to add floats to style the image position so important to remember to clear these to stop images popping below the bottom of your articles.


Additionally, to add further confusion, images can be wrapped inside paragraph content, lets test some examples here. Vivamus sagittis lacus vel augue laoreet rutrum faucibus dolor auctor. Maecenas sed diam eget risus varius blandit sit amet non magna. Aenean lacinia bibendum nulla sed consectetur.Vivamus sagittis lacus vel augue laoreet rutrum faucibus dolor auctor. Maecenas sed diam eget risus varius blandit sit amet non magna. Aenean lacinia bibendum nulla sed consectetur.Aenean lacinia bibendum nulla sed consectetur. Aenean eu leo quam. Pellentesque ornare sem lacinia quam venenatis vestibulum. Donec ullamcorper nulla non metus auctor fringilla. Aenean lacinia bibendum nulla sed consectetur.
And then… Finally, users can insert a WordPress
, which is kinda ugly and comes with some CSS stuck into the page to style it (which doesn’t actually validate, nor does the markup for the gallery). The amount of columns in the gallery is also changable by the user, but the default is three so we’ll work with that for our example with an added fouth image to test verticle spacing.
| Table Head Column One | Table Head Column Two | Table Head Column Three |
|---|---|---|
| Table Footer Column One | Table Footer Column Two | Table Footer Column Three |
| Table Row Column One | Short Text | Testing a table cell with a longer amount of text to see what happens, you’re not using tables for site layouts are you? |
| Table Row Column One | Table Row Column Two | Table Row Column Three |
| Table Row Column One | Table Row Column Two | Table Row Column Three |
| Table Row Column One | Table Row Column Two | Table Row Column Three |
| Table Row Column One | Table Row Column Two | Table Row Column Three |
Currently WordPress blockquotes are just wrapped in blockquote tags and have no clear way for the user to define a source. Maybe one day they’ll be more semantic (and easier to style) like the version below.
HTML5 comes to our rescue with the footer element, allowing us to add semantically separate information about the quote.
This is a standard paragraph created using the WordPress TinyMCE text editor. It has a strong tag, an em tag and a strikethrough which is actually just the del element. There are a few more inline elements which are not in the WordPress admin but we should check for incase your users get busy with the copy and paste. These include citations, abbr, bits of code and variables, inline quotations
, inserted text, text that is no longer accurate or something so important you might want to mark it. We can also style subscript and superscript characters like C02, here is our 2nd example. If they are feeling non-semantic they might even use bold, italic, big or small elements too. Incidentally, these HTML4.01 tags have been given new life and semantic meaning in HTML5, you may be interested in reading this article by Harry Roberts which gives a nice excuse to test a link. It is also worth noting in the “kitchen sink” view you can also add underline styling and set text color with pesky inline CSS.
Additionally, WordPress also sets text alignment with inline styles, like this left aligned paragraph. Aenean eu leo quam. Pellentesque ornare sem lacinia quam venenatis vestibulum. Cras mattis consectetur purus sit amet fermentum.
This is a right aligned paragraph. Aenean eu leo quam. Pellentesque ornare sem lacinia quam venenatis vestibulum. Cras mattis consectetur purus sit amet fermentum.
This is a justified paragraph. Aenean eu leo quam. Pellentesque ornare sem lacinia quam venenatis vestibulum. Cras mattis consectetur purus sit amet fermentum.
Finally, you also have the option of an indented paragraph. Aenean eu leo quam. Pellentesque ornare sem lacinia quam venenatis vestibulum. Cras mattis consectetur purus sit amet fermentum.
And last, and by no means least, users can also apply the Address tag to text like this:
…so there you have it, all our text elements

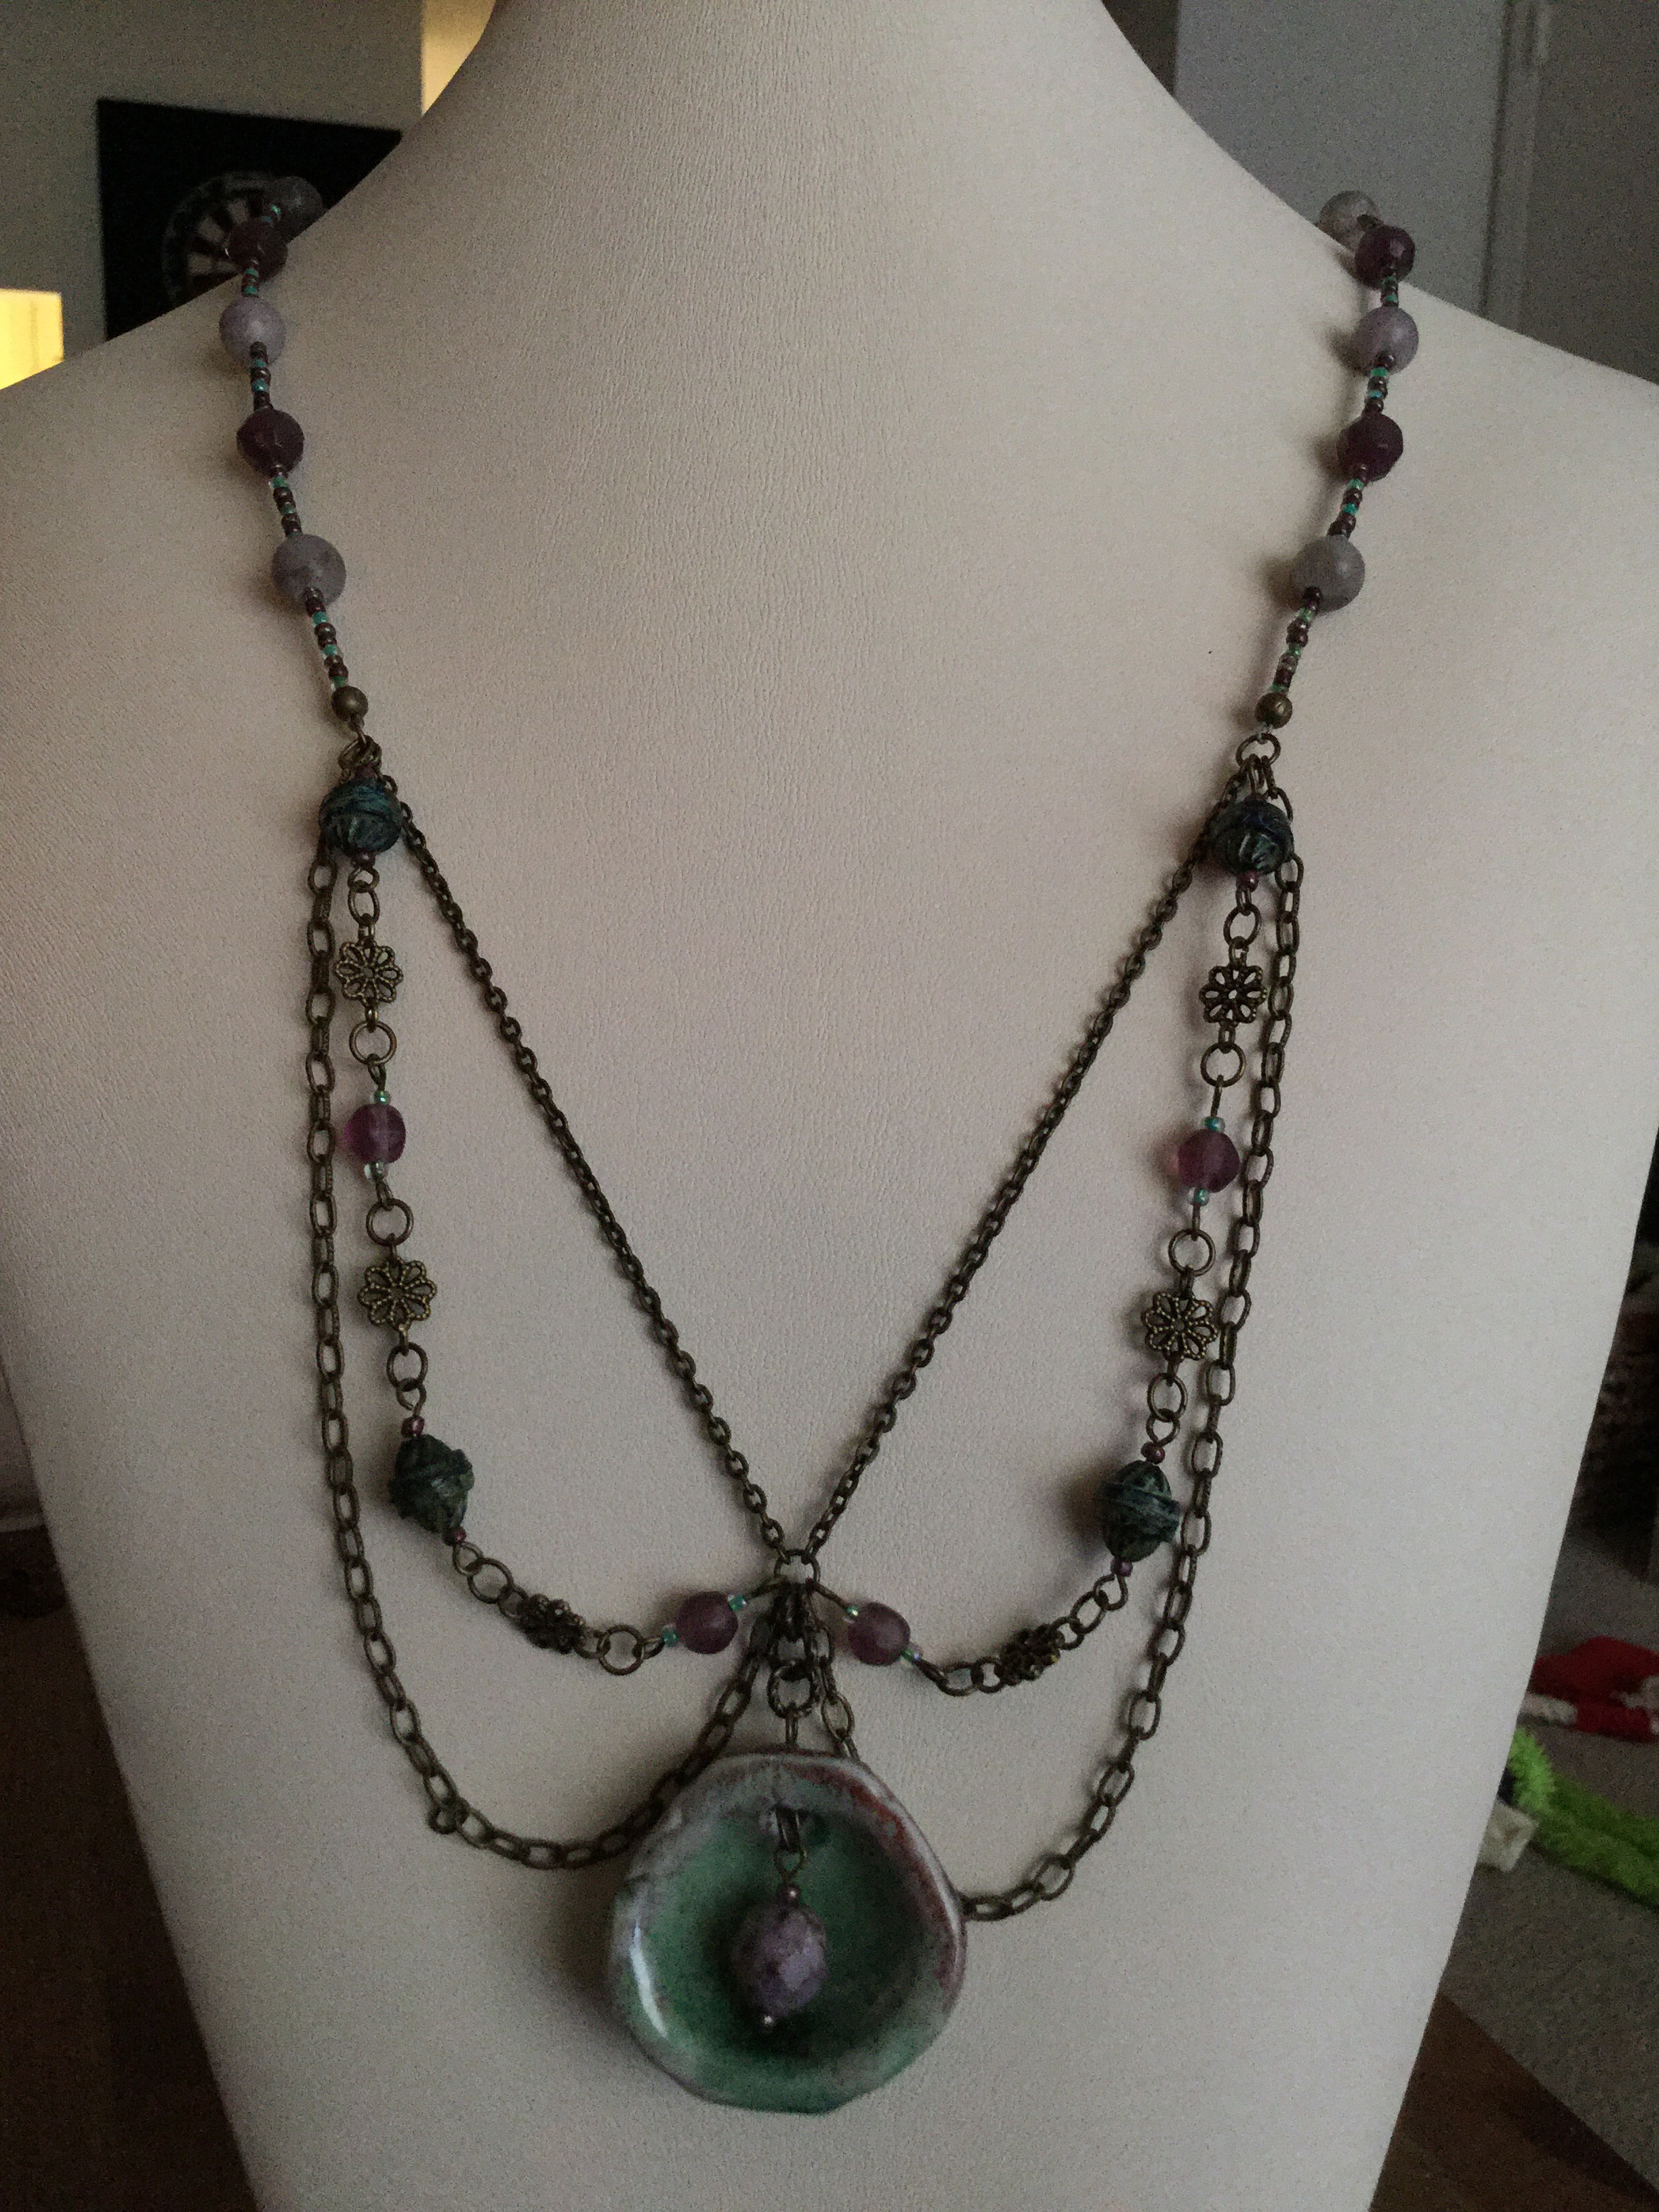
Since this week’s color is in the same family as last week’s, I decided to continue with the lilac stone rounds and create a pair of earrings to match last week’s necklace!
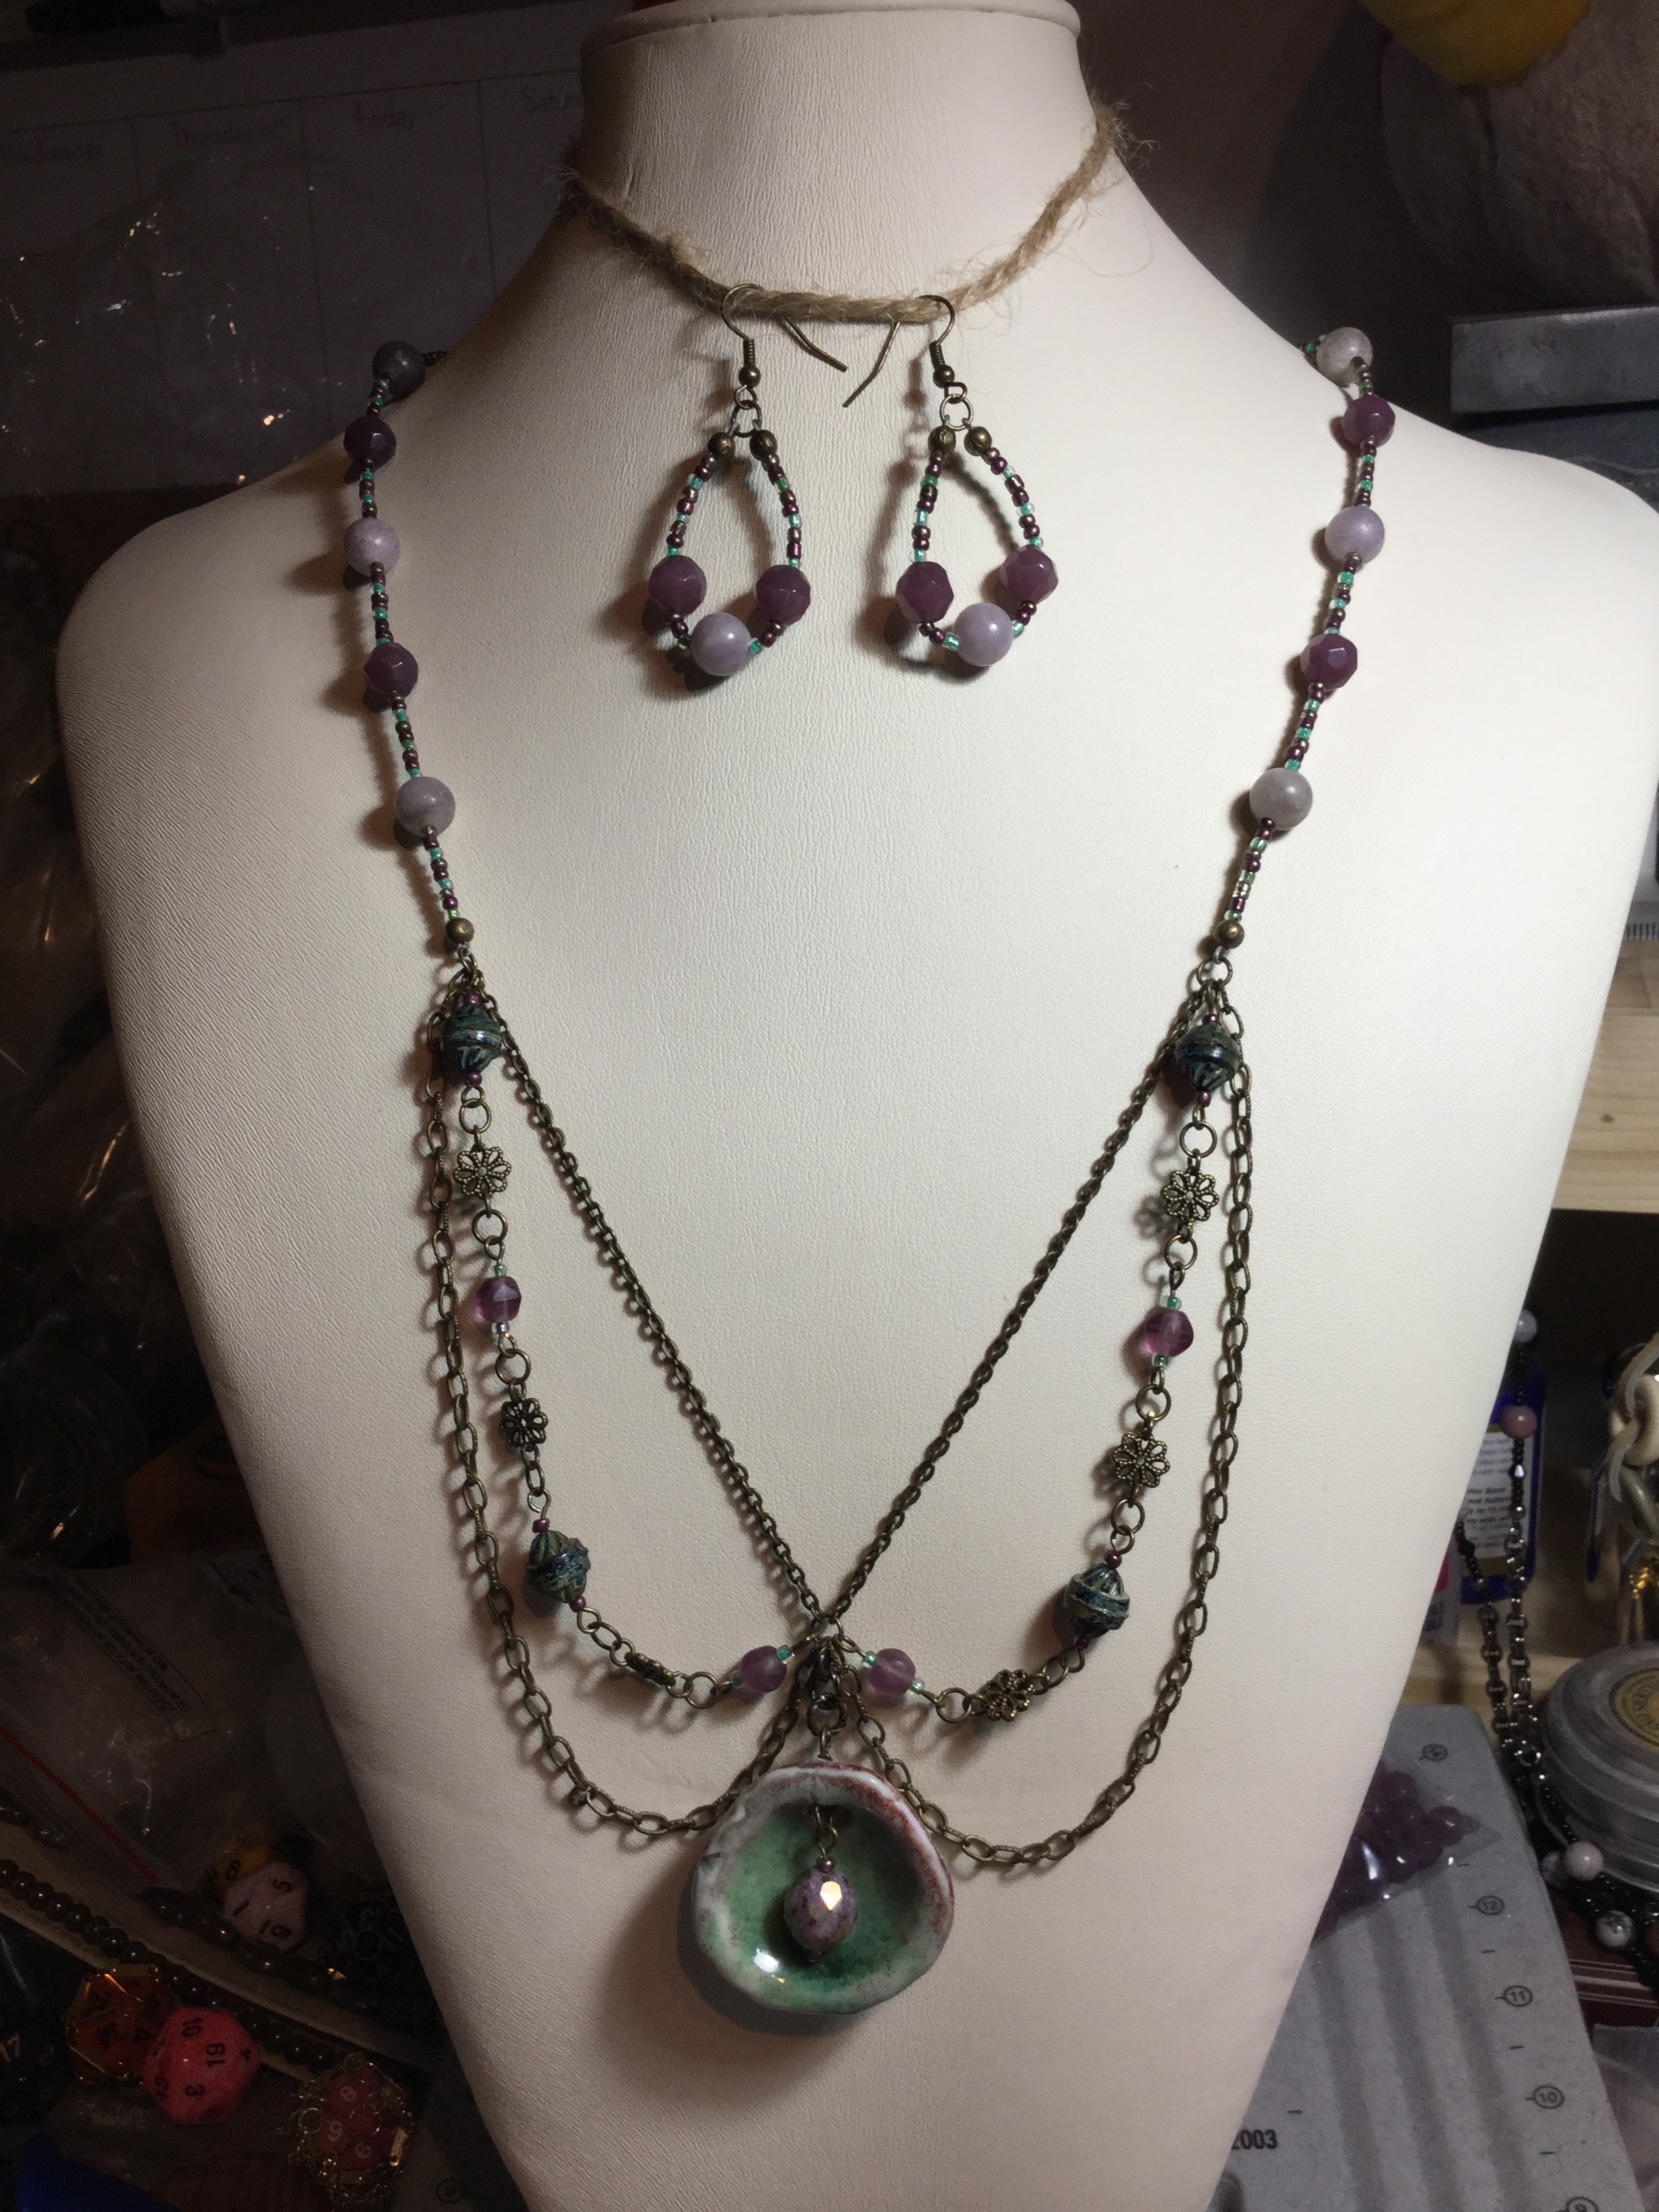

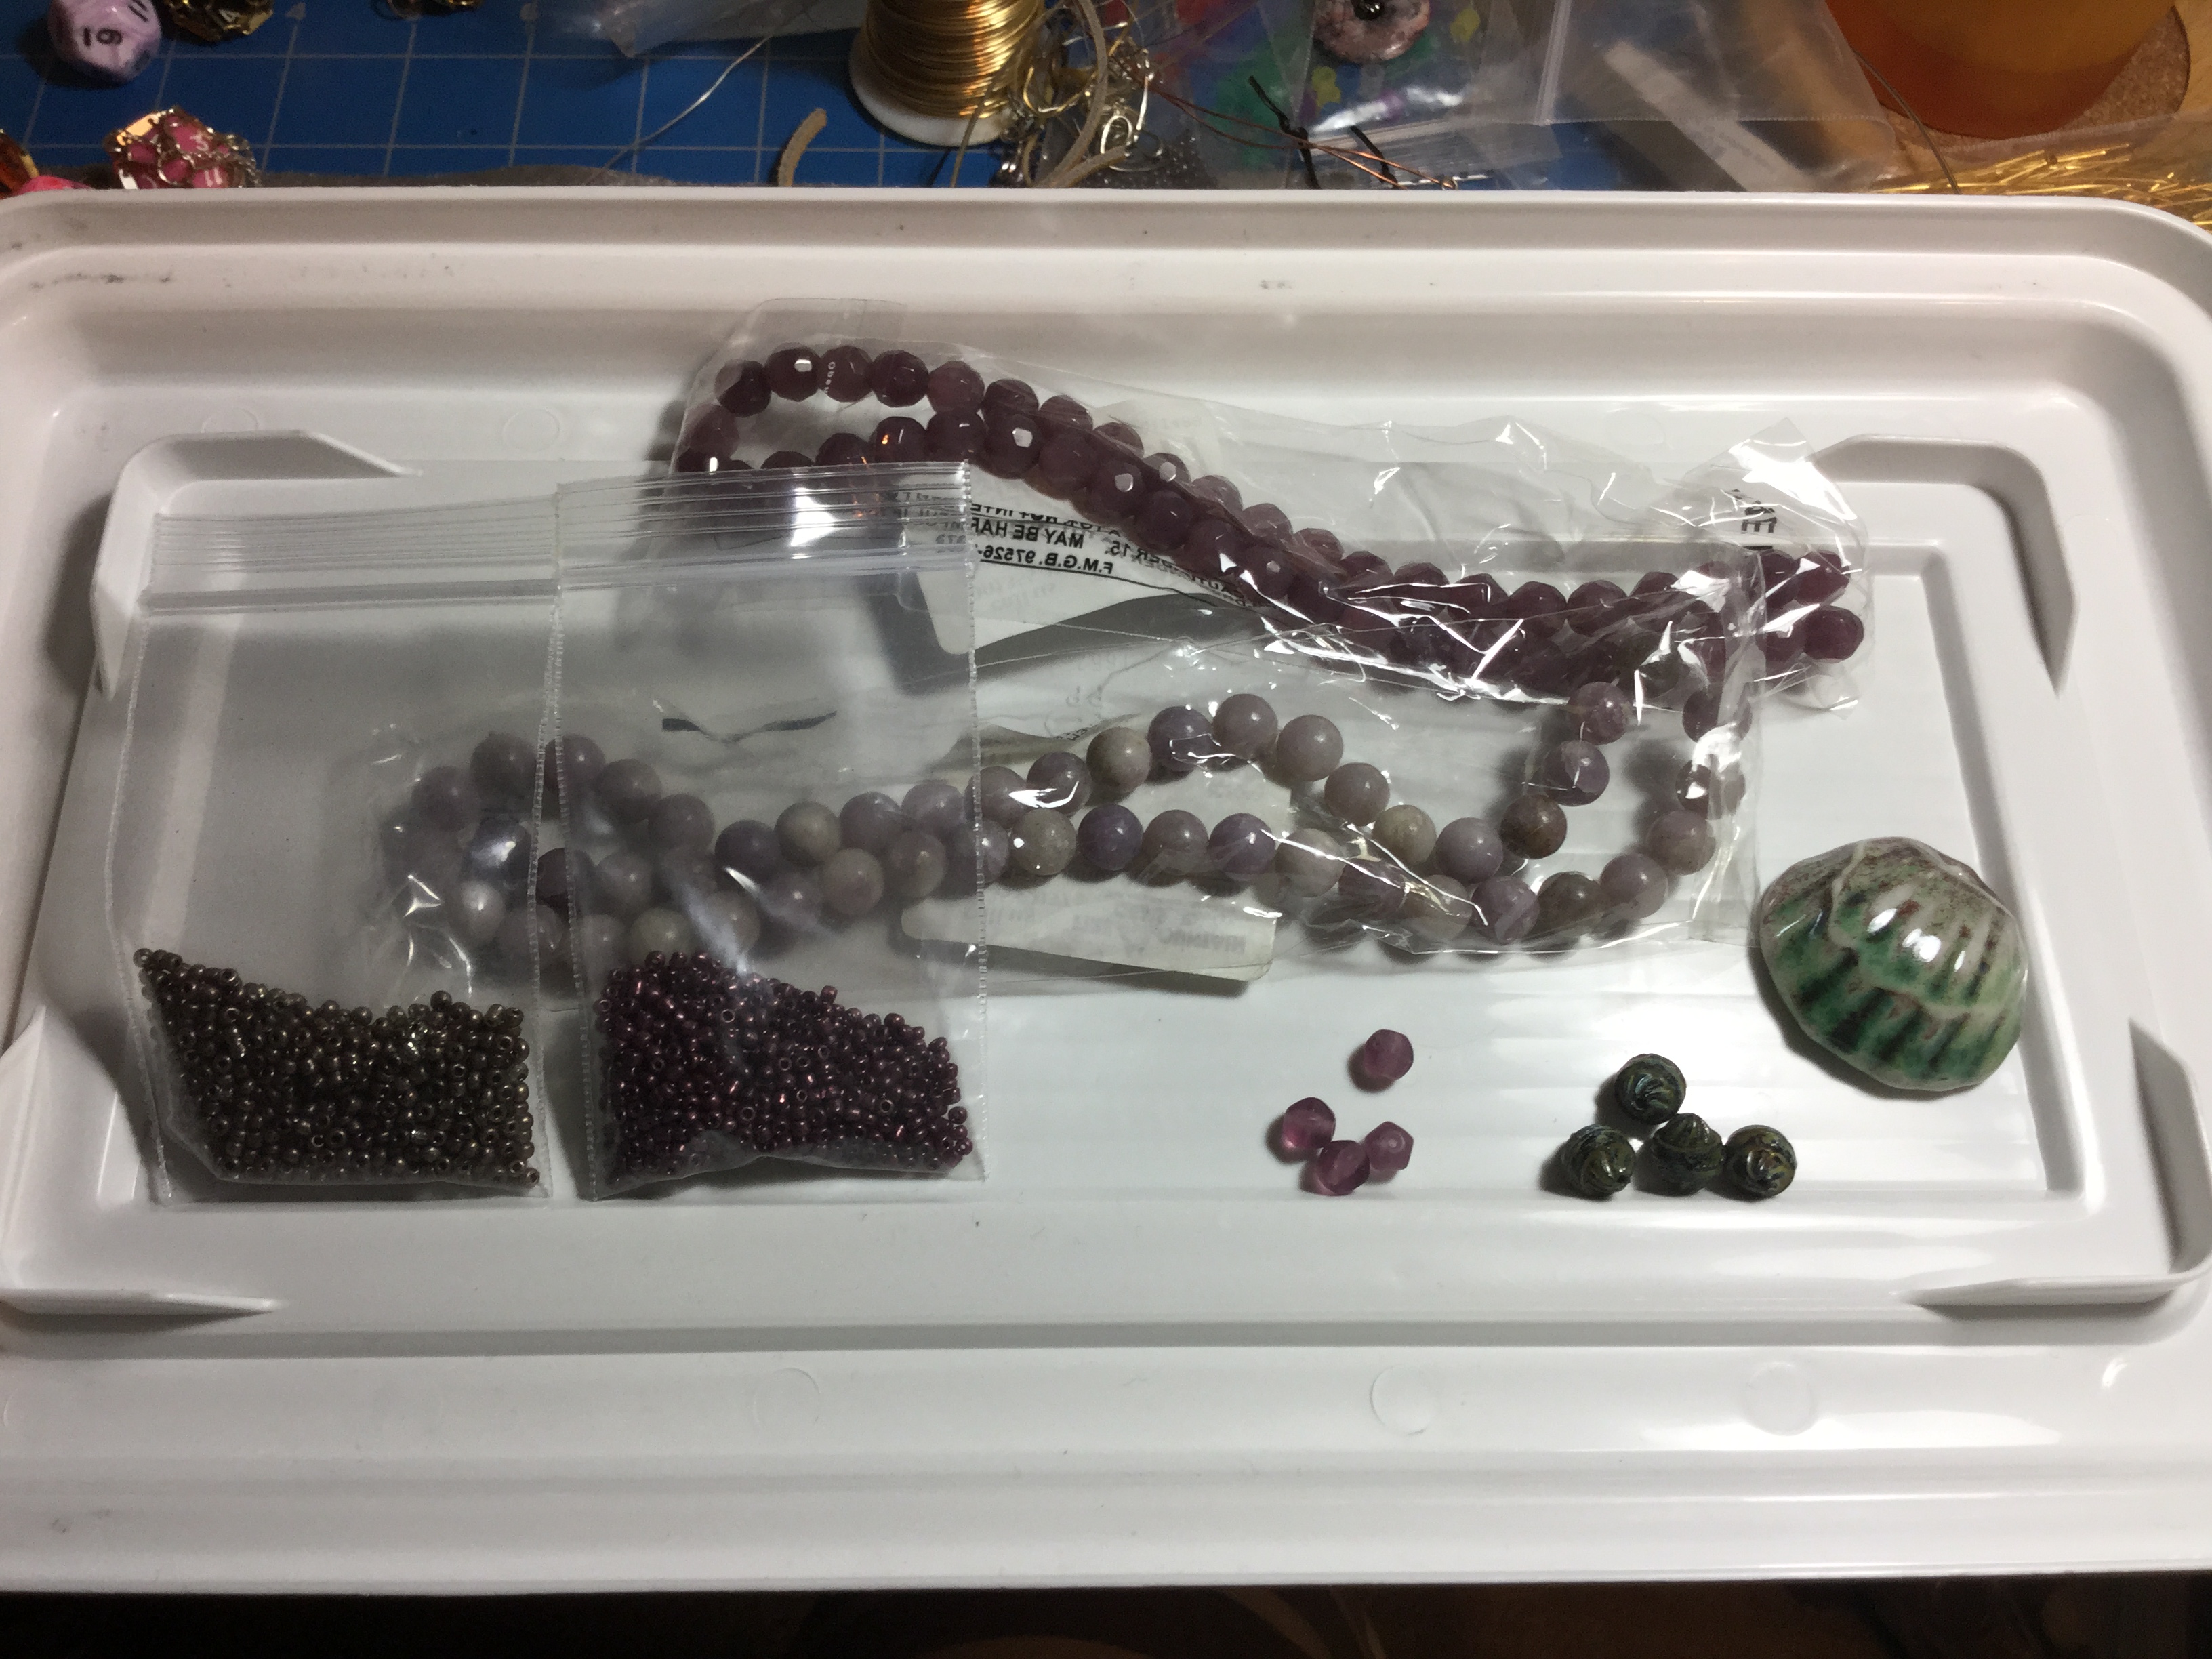
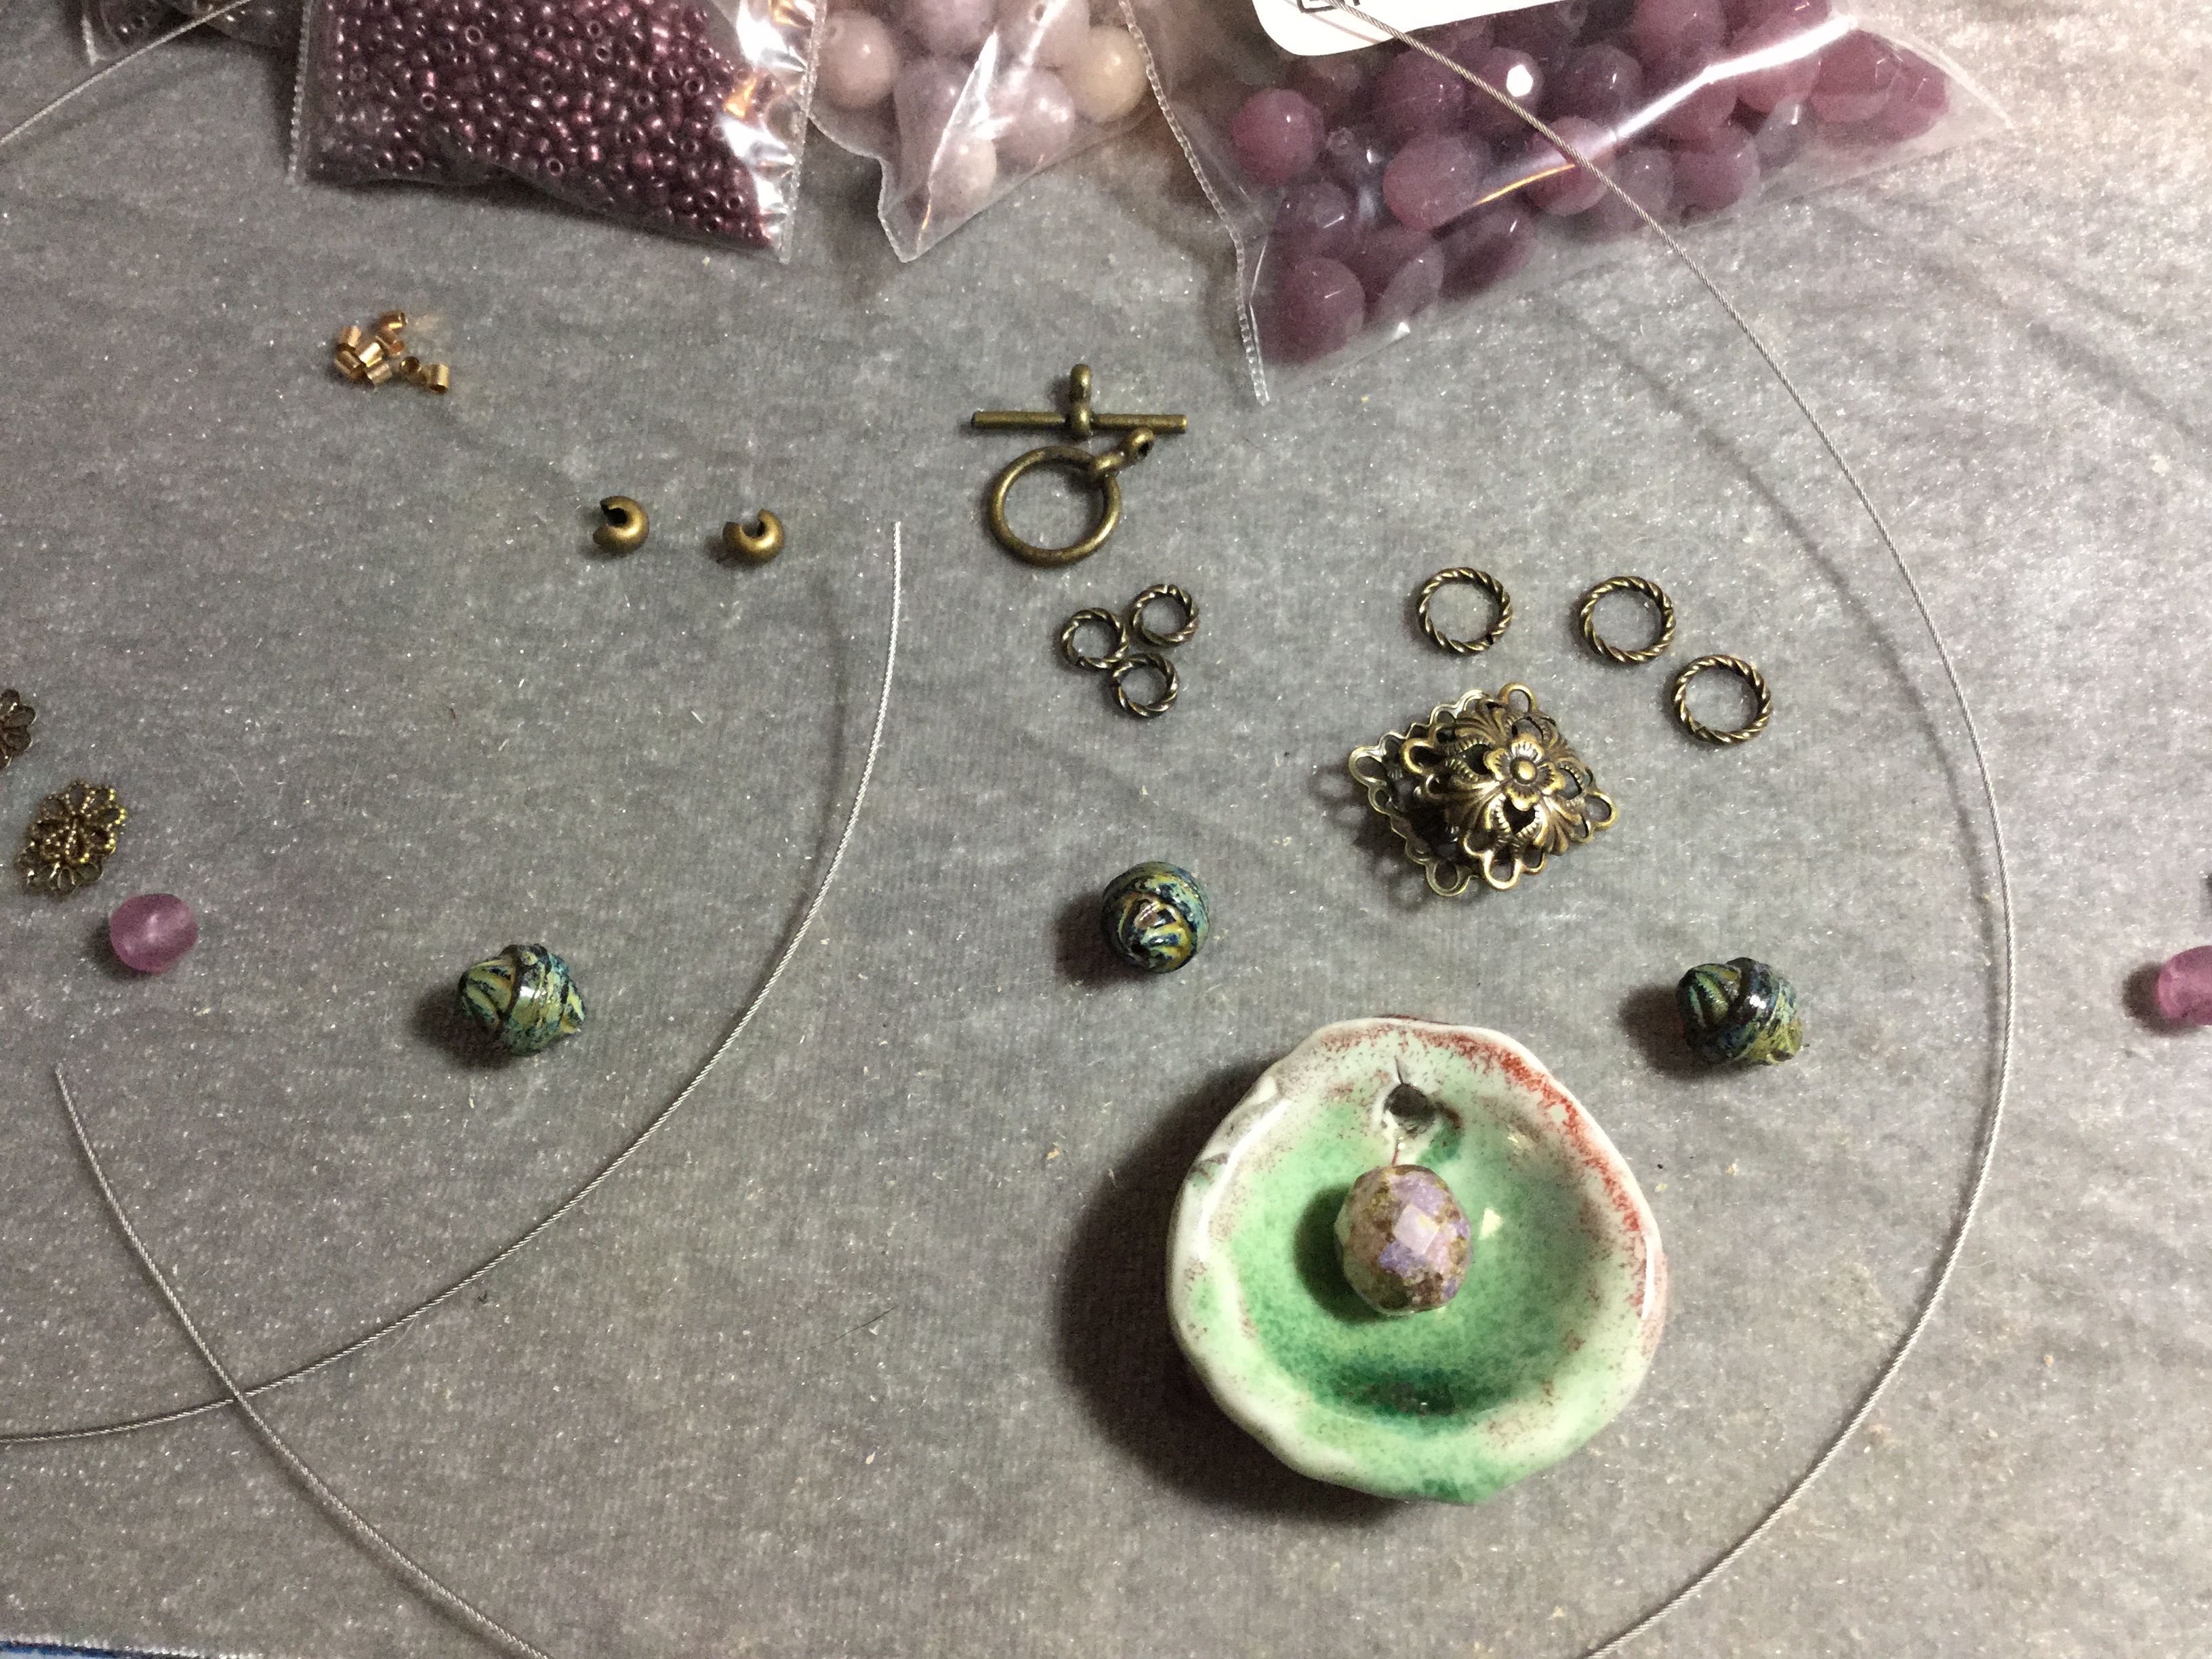
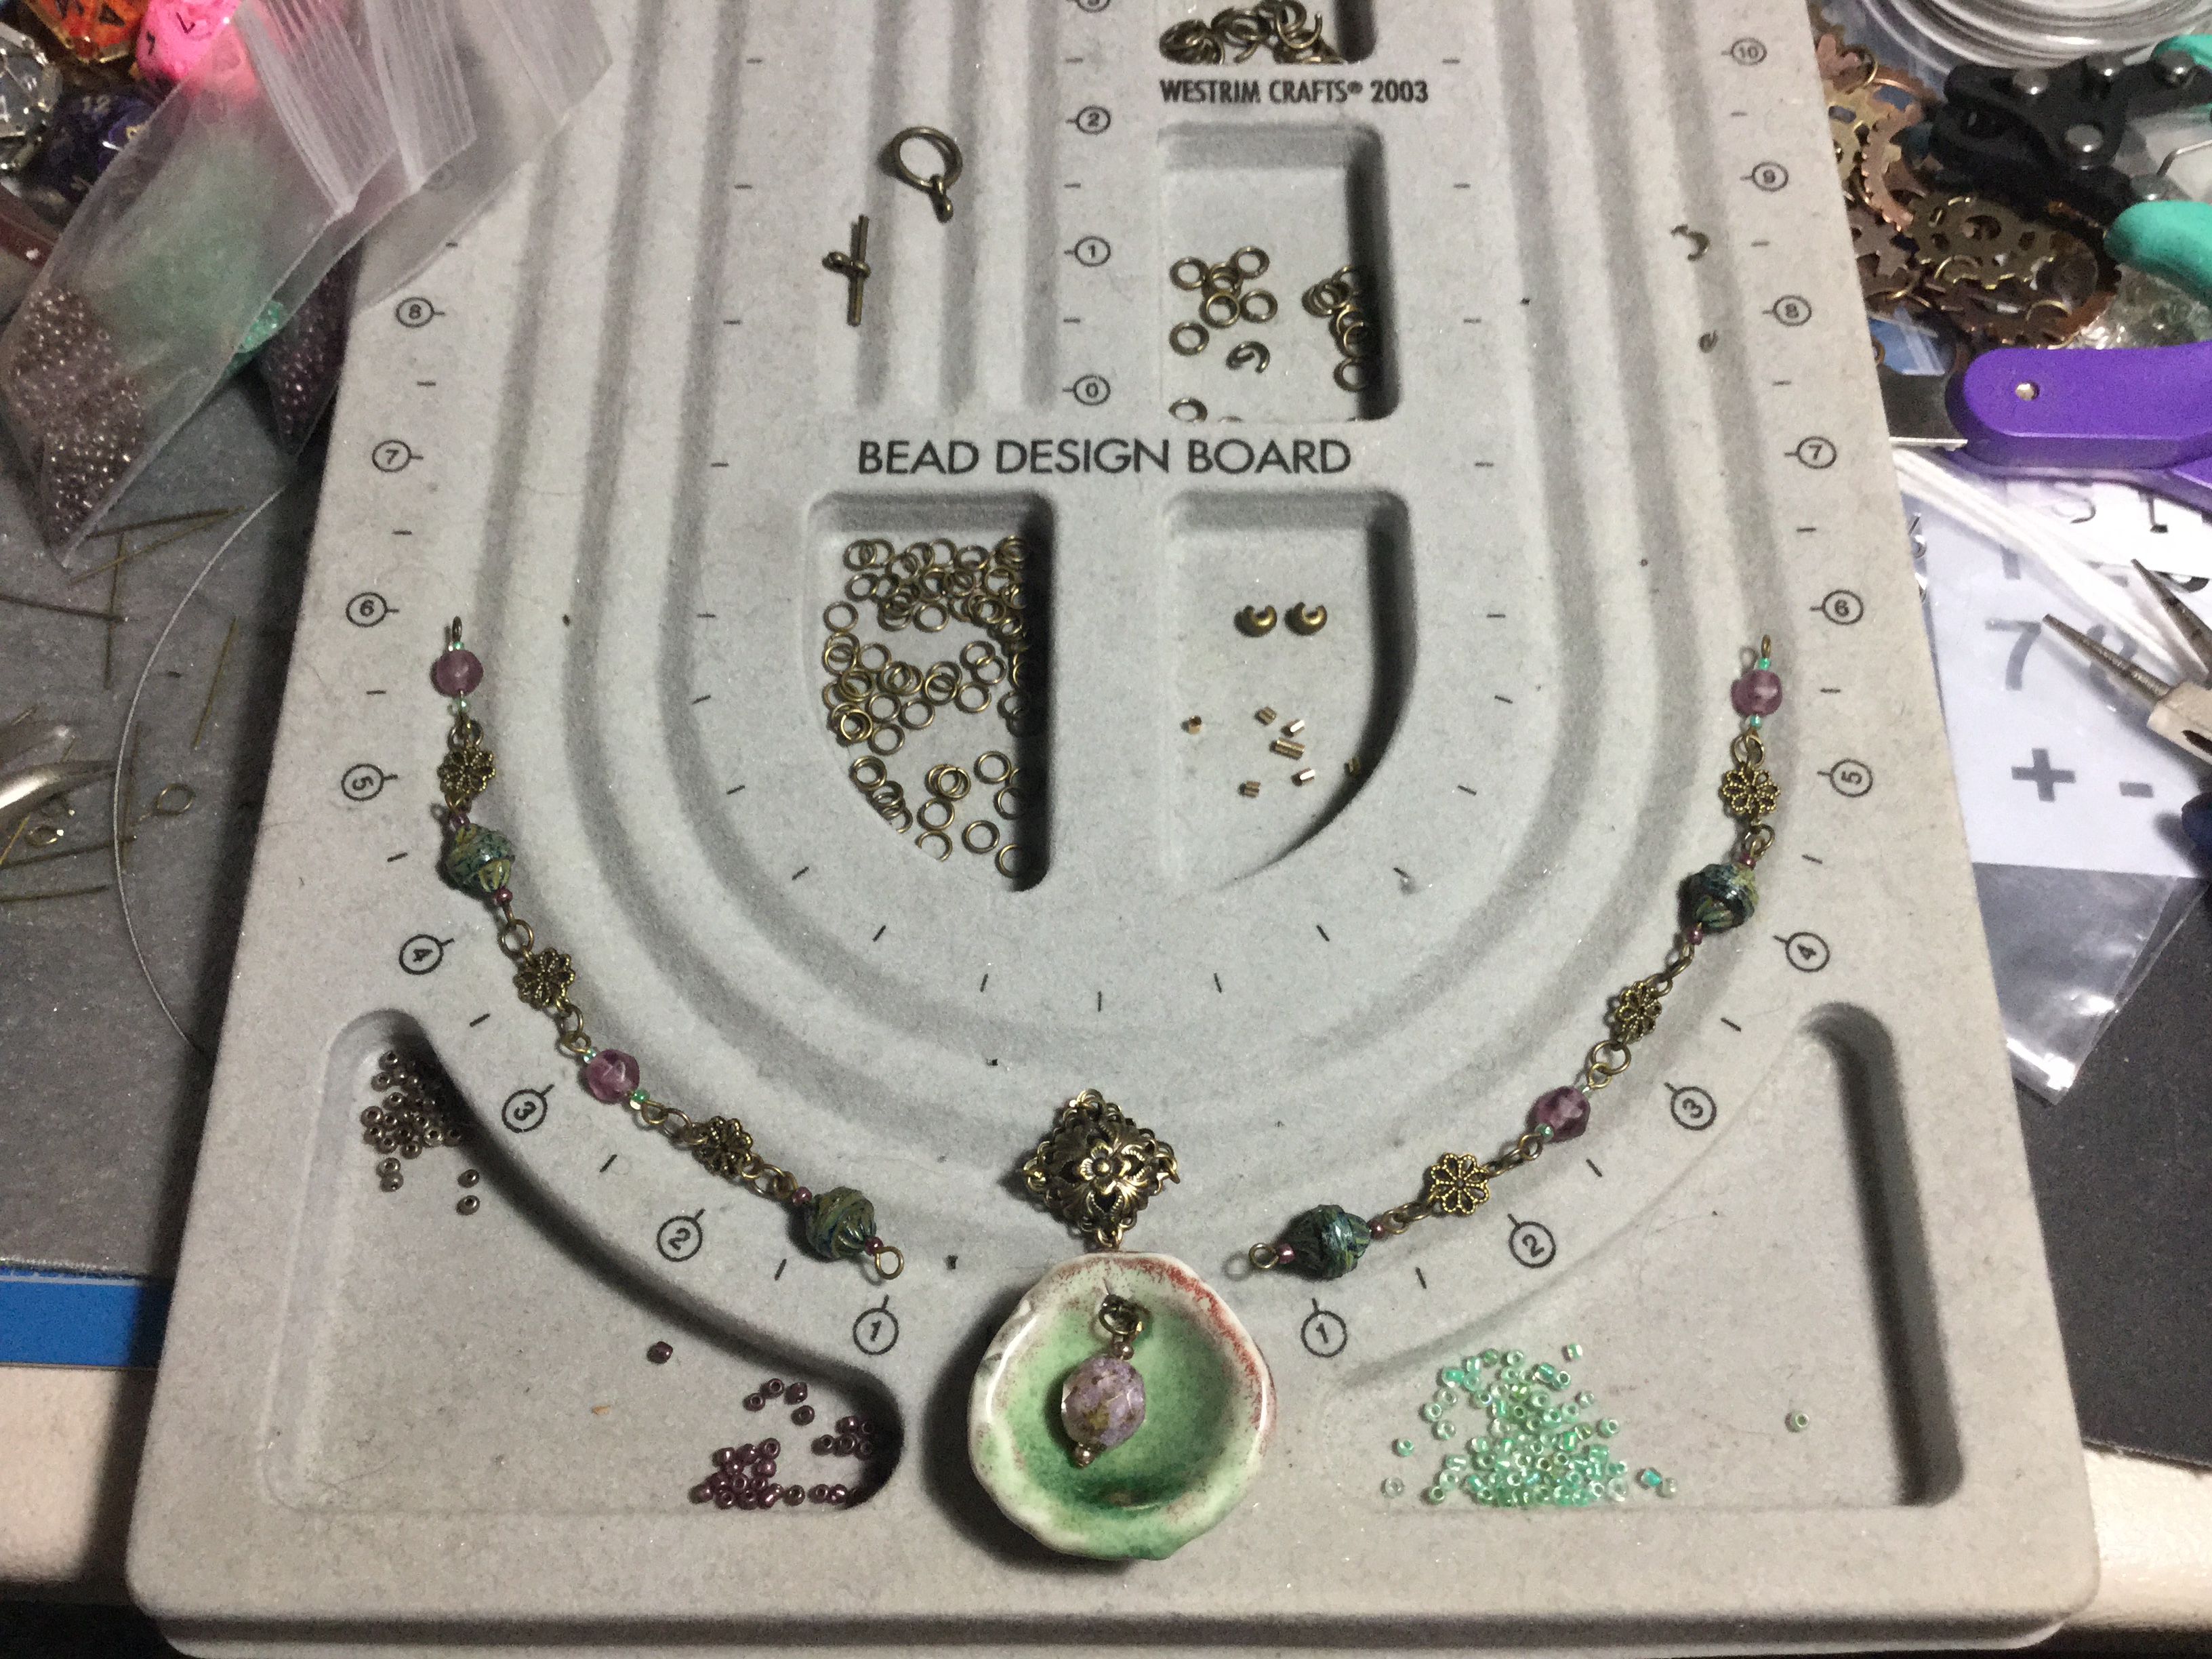
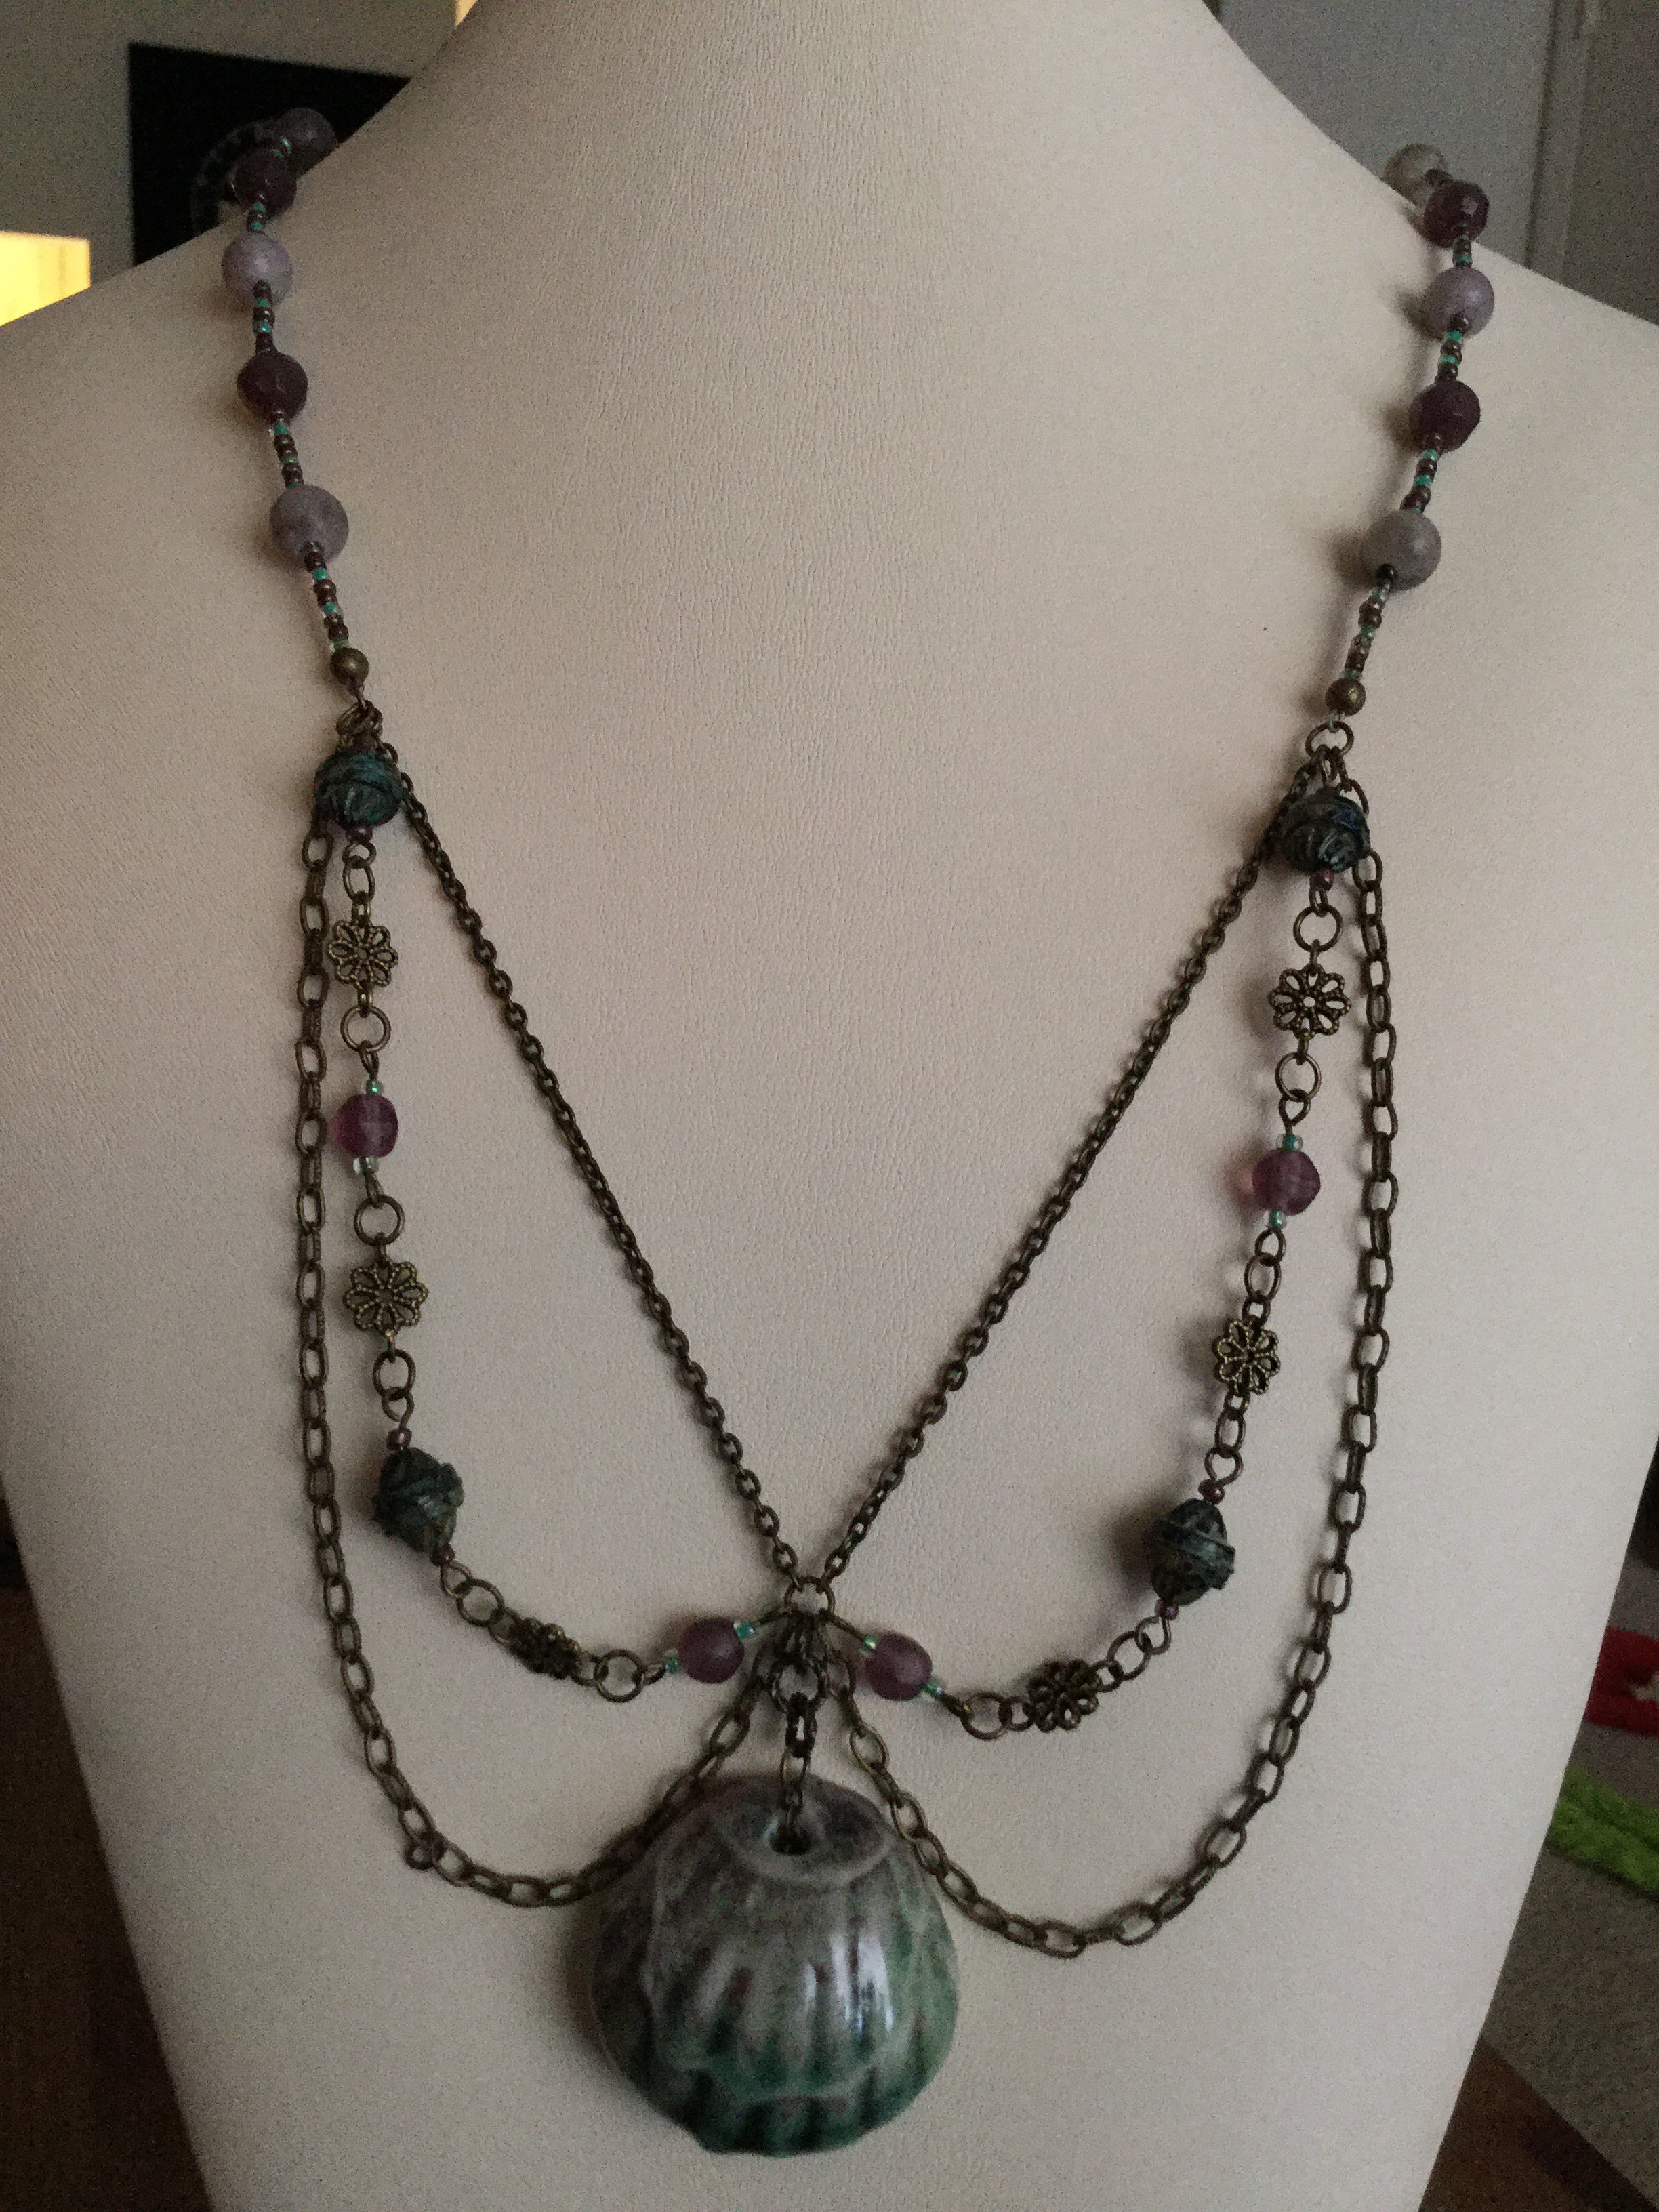
This piece was made with lilac stone rounds, faceted and pressed glass beads, glass seed beads, and antique brass-colored accents.